DIY Crate Bookshelf Tutorial

Our huge collection of kids books were being stored in a short Ikea billy bookcase in the playroom. I decided to add a craft desk in the playroom (blog post on that later), but that meant the books had to go somewhere else!
My son Boston is 5, loves books. It made perfect sense to put all the books in his room. I wanted something different than your typical bookcase and started the search on Pinterest. His room is small, which narrowed down the search since a lot of what I loved, just wouldn't work in his room.
Above picture is where I was testing the shape and size, making sure it worked (bottom crate is one I already had stained dark for another profect).
The crates are all from Michaels Craft Store, they cost $19.99 CAD each. Since I go to South Commons and/or Michaels every few days, I picked one up every time I passed by with a 40% off coupon. Making them $11.99 CAD. Home Depot has the crates for around $12 but I found them a little more rough, but if you have an electric sander, or want more rustic, those would work. Make sure to get crates that look square with no warping in the slats.
Overall I spent just over $120. Keep in mind, I had a few items on hand already (drill, sander, screws, etc) and aren't included in the $120.

*Disclosure: This post contains affiliate links. This post contains affiliate links. This means I may earn a commission should you chose to make a purchase using my link.
Materials Needs:
8 unfinished wood crates - Any size would work but I used 12.5 inches (H) x 17.75 (L) x 9.5 (D)
Sander or just a few grades of sandpaper would work
Rags
Plastic table cloth - If you don’t need a huge pack, you can buy single ones at any Dollarstore
Minwax Provincial Stain - 946ml can (or any other color of stain or paint)
Drill or screwdriver
Screws - 1 inch
L bracket (not pictured)
Steps!
First sand down your crates. The inside is pretty rough, I spent the most time sanding in there. I left it still rough, just not as rough as it was! Next dust off.
Place crates on plastic. Dollarama has plastic table clothes I buy often for my sign business, just double up to be safe! Using your sponge brush, stain every inch of the crate. When finished, wipe down the crate with the rag. I found the sponge brushes only lasted about 1-2 crates before they broke.

After the stain is dry about 8 hours. Using a lint free rag, coat each crate with the top coat of your choice.
The next step can get a little frustration but your almost done! Start with the crates that you think are in best condition. Line up the bottom two crates and pre-drill through one side of the crate towards the back. Holding the crates so they don't shift, screw/drill in your 1 inch screw.

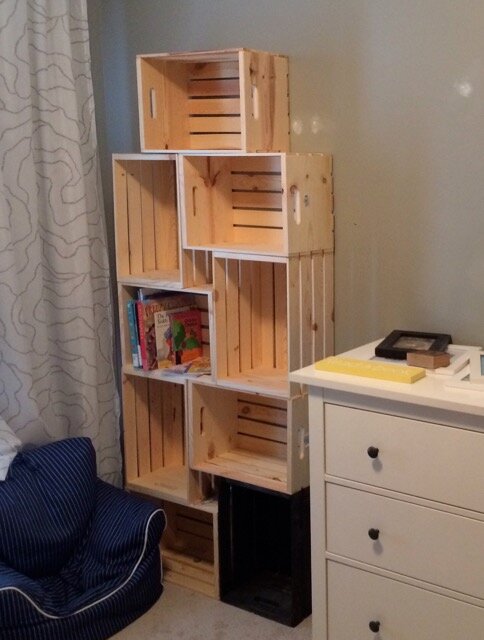
Continue building the bookcase, one crate at the time. I focused on making sure the outside and the more obvious places were lined up. BUT realized that it won't be perfect. First picture below shows where I lined up the edges as best as I could. The second picture shows where in the middle of the bookcase, it isn't lining up.


After all 8 crates are attached, I screwed in some extra screws where I felt the bookcase was weak and needed a little extra support!
Last attach to the wall using a L bracket. Very important step!
The overall size of the bookshelf is 30.5 inches x 61 inches and 9.5 inches deep.

Now trying to keep a bookcase in my 5 year old room neat and tidy.... without their own "treasures" will be a little challenging but we will get through it!

Update: Love the shot the Realtor took! I need a wide angle lens and better photo editing skills!

I pinned a bunch of different layouts and ideas using crates! Check out my Pinterest album here.